Monday, 13 June 2011

It's a great way to stay in shape

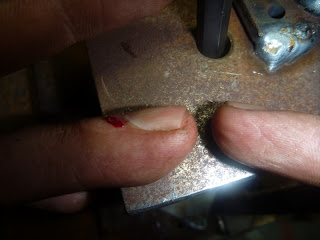
Today was a great day to stay in shape. To my three loyal followers sorry there is NPFRC (no penny farthing related content) this week while we had a public holiday. Although my finger is a lot better thanks for asking. Did you see how I subtly worked in that I now have 3 followers! My quest for blogging immortality is coming to fruition. I'll soon knock Fatty off his lifetime achievement perch


This morning I decided to go for a ride on the roadie. I like my road bike it has a carbon frame (since all lifeforms on earth are based on carbon I wonder why it's so expensive?) it's a nice fast light bike and a pleasure to ride. With a nut bar in the back of my jersey I headed off towards Redcliffe on a regular ride.

On the way out I was struck by an idea how about a bridge challenge! A 7 bridge challenge! I would ride over the major bike and road bridges in Brisbane! I would use exclamation marks with reckless abandon! Take! that! society! In! your! face! As with all major life decisions I channelled my sensei who spoke to me and showed me what I need to ride over!

Whilst my sensei has never steered me wrong I checked with my emergency back up penguin sensei who showed me the light.

Well that clinched it, it was obvious both masters agreed, I will ride over lots of bridges.

Thinking about this challenge made me realise my mathematics skills are really poor and I would actually need to ride over 10 bridges (plus one nut bar wasn't going to cut the mustard nor curdle the cream). So the TBBC (Ten Bridge Bike Challenge) was established. The three ground rules est 7:45am 13/06/2011 -
1. I needed to ride over the entire bridge not just half way and turn back,
2. What ever bridge I decided to include was part of the challenge
3. That was about it.

The bridges in order of completion were
Ted Smout Memorial Bridge (Bridge to Redcliffe) July 2010
Sir Leo Hielscher Bridge (Gateway Bridge) opened June 2010
Story Bridge opened July 1940 (Bradfield Highway) 
Goodwill opened October 2001
Victoria opened 1969
Kurilpa opened October 2009
William Jolly opened March 1932
Go Between opened July 2010
Eleanor Schonell (Green Bridge) opened December 2006 
Jack Pesch (Indooroopilly) opened October 1998
I also went over the land bridge at Herston but since it doesn't go over water and stuffs up the nice ten with a strange and decidedly bizzare looking 11 I've discounted it, in addition I haven't included Centenary Bridge as I forgot about it. The rules dating back to several hours ago indicate it is perfectly acceptable to not count it.

The first bridge Ted Smout it about 20kms from home, it's a looong bridge (2.74kms), the old bridge was so rough you needed new fillings after each time you rode it. The new one is very nice wide and separate peds and cycling with a line.


The second bridge Gateway was about 25kms from the first. It is a decent climb this bridge also a little controversial when it was opened as some genius thought that 10kmh was a realistic speed. I've heard of people doing comfortably and safely 60kmh down (when nobody is around of course)

Next stop was the Story bridge a decent hike from the Gateway. I regularly use this bridge to commute. It's pretty busy and a bit narrow and you get the pleasure of breathing the fumes from all the cars. Generally i just want to get across it. 'Intersting' note it is the shortest highway in Australia.

Goodwill bridge was a big deal for cyclists and pedestrians a missing critical link. I use it regularly as does thousands and thousands of others. There can be tension between users but rarely any problems. 

Victoria bridge is home of the worlds thinnest on road bike lanes. Even on my road bike my lust ledges (aka love handles) hang over the edge (this photo is from the off road path note the Aaron 'licence plate', pretty stylish hey!)

Kurilpa bridge had a fairly controversial design kind of like those images of spider webs on drugs. It's surprisingly steep coming up from the south side. 

The William Jolly was one of the bridges I forgot about when I first counted in my head the number of bridges. Whilst you can ride across it, the path design is suboptimal generally I use the roads

Go between is a toll bridge for cars and free for bikes and pedestrians. It's fantastic they included cyclists and peds but it is the fifth bridge in the space of a couple of kms.

I took this photo to show the exciting design features. It's cyclists only on this side and pedestrians on the other.

The Eleanor Schonell Bridge really opened up access to University of Queensland. You'll note the plastic bag special effect it is a special effect exclusive to my camera.

The final official bridge was the Jack Pesch an extremely popular bridge and home to the worlds largest bollard. It is the most popular tourist attraction in Brisbane even on an international level far outshining the biggest ball of twine in Minnesota. Whilst that guy may look normal he is actually a giant standing 10m away from the bollard.

And here is my bike on the bridge. Note in the background there used to be pontoons along there but the floods destroyed them.

This was a picture from the land bridge but please don't look at it as it doesn't count.

The TBBC was complete with about 107.5kms travelled. I ate one nut bar and stopped and bought a snickers and it really satisfied.

Thanks sensei spongebob for your guidance to complete the TBBC.


Thanks Sensei penguin for your confirmation of the guidance to complete the TBBC!

In a perfect world they would be sensei spongebob penguin

Tuesday, 7 June 2011

Stop Hammer Time


Yes Stanley Kirk Burrell aka MC Hammer it was indeed hammer time.

Tonight i was working on putting the flat end bit on the spoke. To do so i used this tool Brett built i mentioned in an earlier post. For ease of reference I've outlined the process in the following 10 easy steps.

1. First you put the spoke in and tighten the nuts
2. You then tap down to this height of two washers
3. Then you attach this metal thing to the top and swing back to hit it
4. You then hit your ring finger with the hammer really hard


5. You then jump around for a while much to the amusement of all around you.

6. Then you feel nauseous get the sweats and want to lie down.

7. You get empathy and compassion from all concerned and your heart fills with so much joy and love you feel like it will explode. They also suggested humour is the best medicine which I almost overdosed on.

8. Then Janine saves the day and bandages it up for you.
9. You take your cup and ball and go home early much to your displeasure as it hurts to move and this class is the highlight of your week. You come to the sad realisation that while MC Hammer said 'you can't touch this' he never indicated 'you can't smash this with a hammer'. But he was psychic about the hammer time stopping me. Spooky!

10. You write a short and painful blog with one hand take some pain killers and go to bed.

That my friends is the abridged version how to put the end bit on spokes.

Monday, 30 May 2011

Mmm bacon

Sorry Homer in this case we are talking about another type of bacon a Kevin Bacon
They said he'd never win.
He knew he had to.
If only he had a onesy.

There is a game called 6 degrees of Kevin Bacon where you can link any actor through no more than 6 connections. However being his doppelganger I feel somewhat closer. What! You don't believe me well here you go have another look at the poster
Now tonight's class we learnt about 7 degrees, which is one better than 6! In your face Kevin! Apparently it's not just the temperature you get the extra blanket out. It is the angle you need to drill the holes in the rim so they don't split as awkwardly as the bill on a second date. This should be a simple and easy thing to understand for any normal person but not me, oh no I had to be slower to catch on than flossing your cats teeth every night. Brett drew several diagrams an example below -
 Now I looked at three versions of this with comprehensive explanations and all I could think of was he must have gone to the Picasso school of art. Eventually I just said I understood so he could stop explaining for both our sakes.

Turns out it was a profile of the wheel the middle was an axle and the spokes went to the rim. Not side on like I thought. I worked that one out on the drive home. Yay me!

There is an extraordinarily scientific and precise way to do this. 

Yes as you'll note at Daryl's foot a block of wood that gives you a 1 better than Kevin Bacon 7 degrees holes or as I prefer 1BTKB7DH. 

I thought since it's been alluded to here by me in this blog (i really need to give myself a good talking too!) and by everyone in the class that I some how get other people to do my work for me. Now to dispel this myth I submit the following as evidence. That is me brazing my rear rim with my hot thing.
 That is me cutting some metal with a saw thingy.
The below was not staged, no matter what you may hear from the twelve witnesses, DNA and video evidence. This was me marking out the rim for the 1BTKB7DH. 
 
 This was using MFTF (my friend the file) to remove most of the excess brass from the brazing so it was smooth. From this...
 To this
All with a smile on my dial a song in my heart and a blog on my mind.
I hope this clears up any misunderstandings about certain posts about outsourcing.

In the interess of your comfort and safety this blog is 1BTKB7DH certified.

Tuesday, 24 May 2011

It's a mustache kinda day

Upon rising this morning I was immediately hit by the feeling and wedgied by an emotion (which hurt thanks for asking) that it was going to be a mustache kinda day.


This lack of mustache is a painful issue for me, from birth until 15 years old I tried day and night to grow a mustache. After 15 years of trying I came to the realisation I've been cursed with genetics that preclude my ability to grow a mustache that looks acceptable in a mustache orientated society.
 
All good ye olde timey bikey have a bikestache. We had three options for our bikestache. Each one slightly different to the next.

The three types we were deciding between (as close as I can tell) was the connoisseur, gringo and business man. My preferred type was the connoisseur.

Now you would think that a bike should grow it's bikestache naturally but mine was naturally hairless of course leaving me distressed, upset and a little sleepy. Now to clarify I wasn't crying I had just cut an onion.

So Brett realising I was bawling my eyes out over my hairless paradox took pity on me helped create a bikstache. Starting with a straight tapered bar made of some kind of metal.


We then cut it in half.

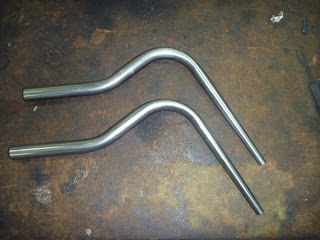
We then got the pipe bender out and started bending the bikestaches. At this point we really could have done with a bending unit.
The machine was surprisingly hard solid work although Daryl was moving so fast he was blurring.

After a couple of bends we got the bikestaches looking like this.
Which then meant we 'had to' do the hilarious pretend mustache. As you can see Daryl didn't need these artificial mustache extensions.
However I did .
Obviously this is the closest I'm going to get to facial hair *sob* *It's just dust in my eye*.

The other exciting thing for the evening. Well some might say this will be the first exciting thing, as frankly that last part was as dull as reading last weeks post.

We released the fires of mordor to do some brazing to join the front wheel.

Brazing you use a metal that burns at a lower temperature to essentially glue the pieces together. In fact a lot of rims now are actually glued together but they require more specialist equipment and some form of accuracy. This was Brett brazing my big rim. (no jokes thank you it's a serious and mostly kinda family friendly blog)
First you prepare the surface with some stuff called 'something'. Then you heat the area and put the brass (in this case) around the joint and into the joint to make it nice and strong.
You then end up with a rim that's nice and strong which I forgot to photo but here is what it looked like.

You'll notice that spongebob has no mustache though but he can grow one....
damn genetics.

Tuesday, 17 May 2011

Outsourcing

Now as a number of large organisations have discovered outsourcing saves a lot of money and all those pesky OHS laws. So tonight I thought I'd give it a go. One of the recurring problems as the long time reader of this blog will realise is the cotter pin. Now I've said twice now that I've fixed it and each time I've been more wrong than it is to marry your cousin.

So tonight I summoned spirits using a dark and super mystic spell and I had just the target in mind Mr X*. Now Mr X is an extremely talented and knowledgeable man who has worked a lot of his life with metal and other materials, he has also made all sorts of interesting tools for us including the crank evenness checker jig thingy and a new one for scribing a mark on our headset (that i will talk about another time). Now with Mr X under my spell he proceeded to do my bidding. Whilst his better judgement was under my control I set him to work fixing finally my ACPC (axle cotter pin conundrum)

His persistence considering the state I had left the ACPC in was above and beyond the call of duty. In memory of his performance I hereby award him the Bikesnobnyc approve for curating my ACPC to within a poofteenth.

After Mr X fixed that I still had some goats blood and oil of Newton from my spell (it's surprisingly easy to get oil off Bert Newton , you just really really have to want it)

 I set Mr X to work on cutting my rear wheel reading for pinning.
Upon completion of this task the spell wore off even with a giant finger upon him, so regrettably I had to do some stuff.

I felt we as a group had a stellar night of performance, we rocked and rolled all night and  partied ev-er-y day

Tonight we got the last of the wheels profiled and then all the wheels turned. Here is me turning my rear wheel which I believe ended up around 17 inches diameter but I can't really remember.


Once the rims were rolled we then had to cut them as Mr X showed earlier. Resulting in an angled join. 

Once cut and encouraged to line up we then cut out a piece from the remaining metal that will sit inside the rim. Here is a set up gratuitous action shot.

This is what you end up with.

We then drilled a hole through each rim and put a nail in to hold it together, it appears I didn't get a photo of this so you will have to use your imagination.

It looked just like that but my wheel doesn't have stars on it... yet.. Now the wheel was temporarily joined Brett will braze the rim together and we can then start work on the spoke holes etc. If you click on that link and read that article you will see why I have no intention of attempting that on a critical component like the rim.

But most importantly at the end of the night we had a fully functional invisible penny farthing that wonder woman would be proud of we could RIPF (Ride/ing an Invisible Penny Farthing)

I can tell you it was scary at that height. Here is a man who is a natural at RIPF

 RIPF away my good man RIPF away.

* For the sake of anonymity names will be withheld in case of con artists who are building their own ordinary bike and troll the Internet for people who are competent, I'm very safe from this scam.